
What you need
- Jira Cloud: an address that ends in
.atlassian.net. - A Jira account that may create issues in the project the bugs should go to.
- Admin rights in your UAT Studio workspace.
Connect your Jira project
Create an API token in Atlassian
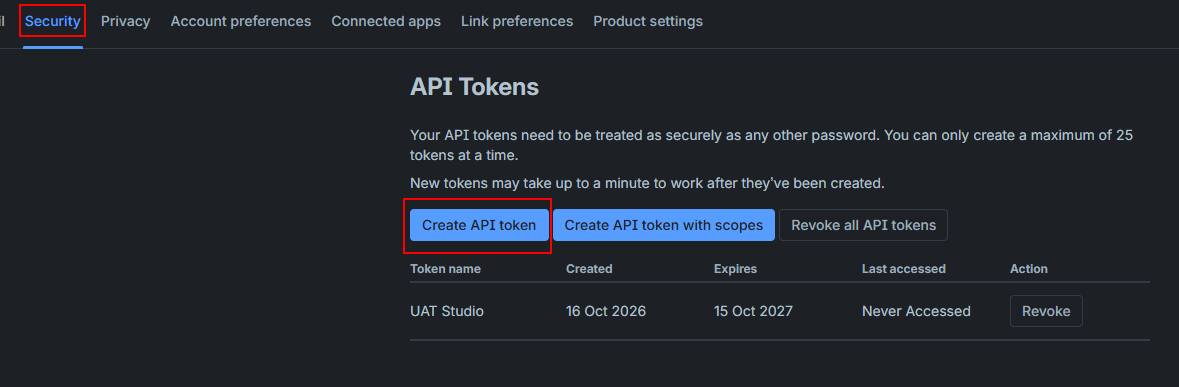
- Sign in to Atlassian with the Jira account you will use, and go to id.atlassian.com › Security › API tokens.
- Click Create API token.
- Give it a name you will recognise later, for example UAT Studio, and choose an expiry date.
- Click Copy. Keep the window open until you have pasted the token in step 5: Atlassian shows it only once.
Find your Jira address and project key
Jira address: open Jira and look at the address bar. Everything up to and including .atlassian.net is your address, for example https://acme.atlassian.net.
Project key: the short code in front of every ticket number. In PORTAL-123 the key is PORTAL. Open any ticket in the project and you see it in the breadcrumb at the top. No tickets yet? Open the project and look at the address bar: the key follows /projects/.
Open Connections in UAT Studio
Sign in at app.uat.studio and open your workspace. Click Connections. You also find it under Setup in any project, as Manage connections.

Add Jira and fill in the settings
Under Add a connection, choose Jira and click Add.

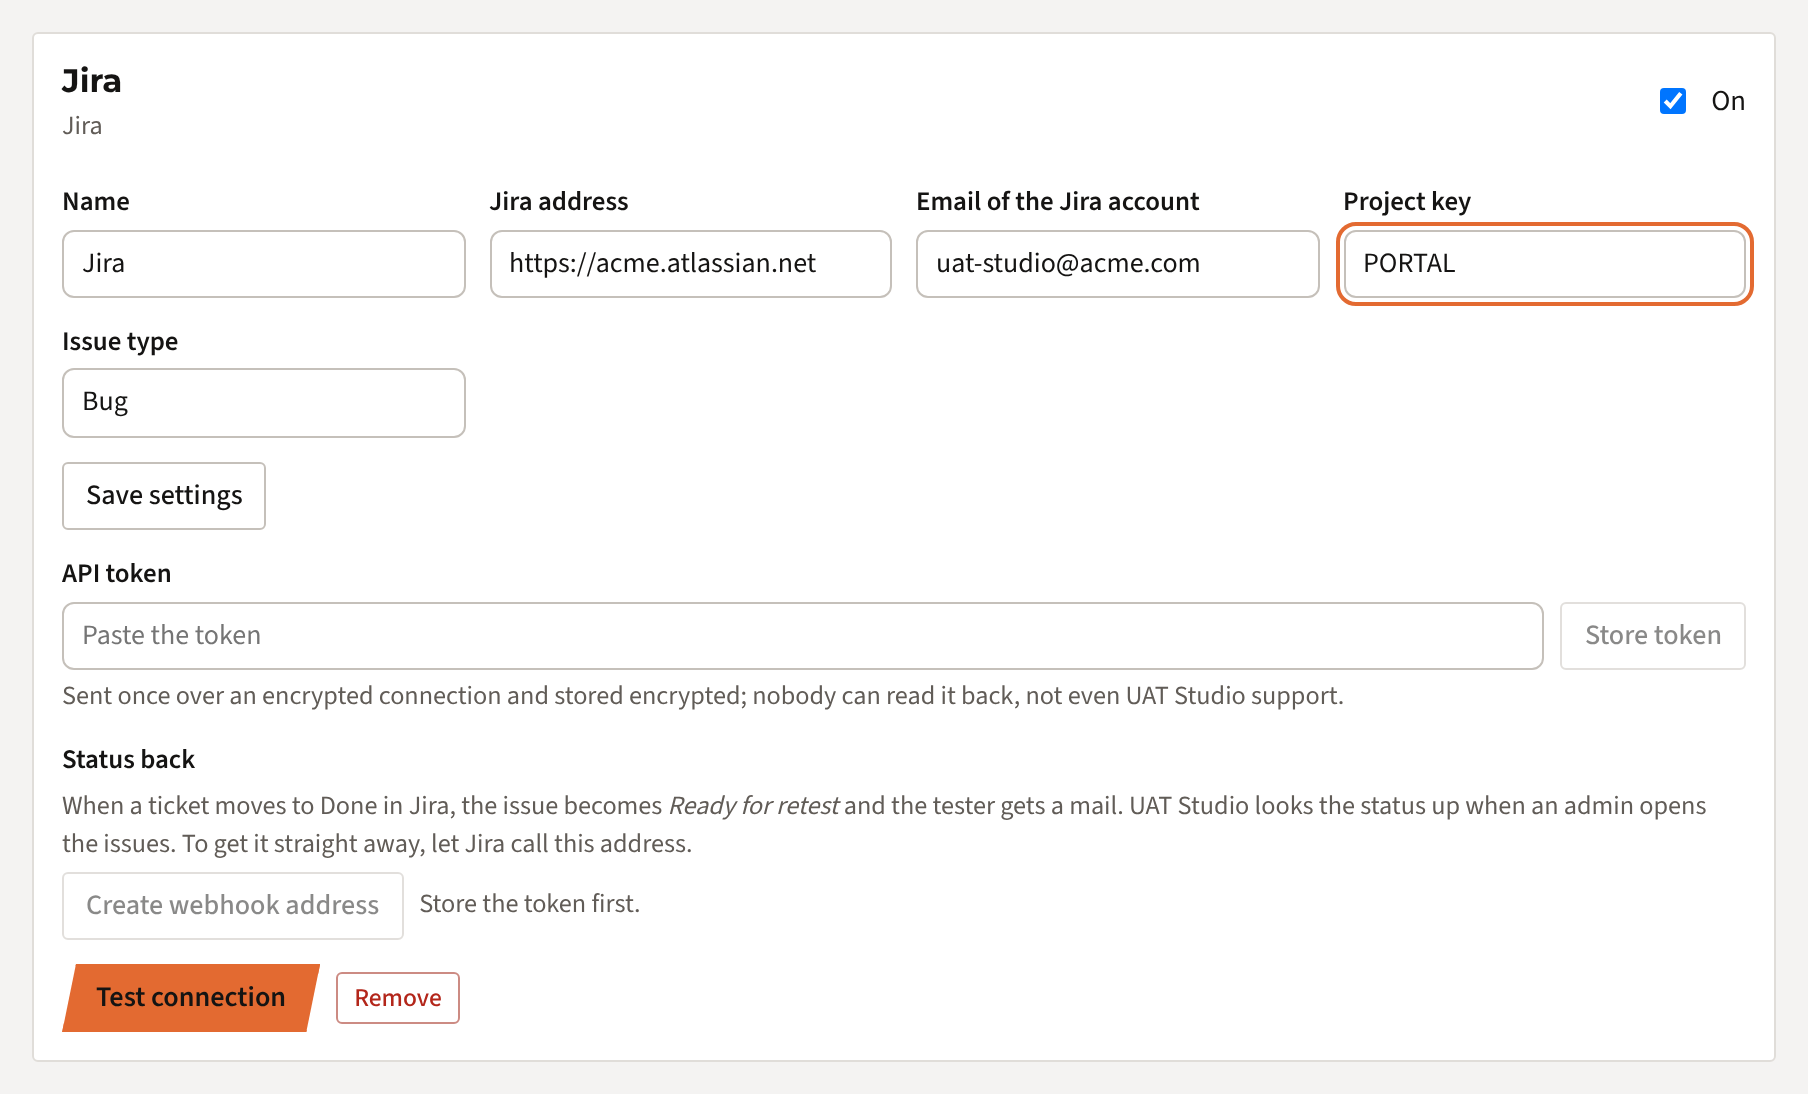
A card for the new connection appears. Fill in:
| Field | What to fill in |
|---|---|
| Name | How the button reads: Send to Jira. Change it if you connect more than one project, for example Portal Jira. |
| Jira address | Your address from step 2, such as https://acme.atlassian.net. |
| Email of the Jira account | The email address of the account that created the token. |
| Project key | The key from step 2, in capitals, such as PORTAL. |
| Issue type | Bug. If your project has no Bug type, use the type your team uses for defects, such as Task. |
Click Save settings.
Store the token
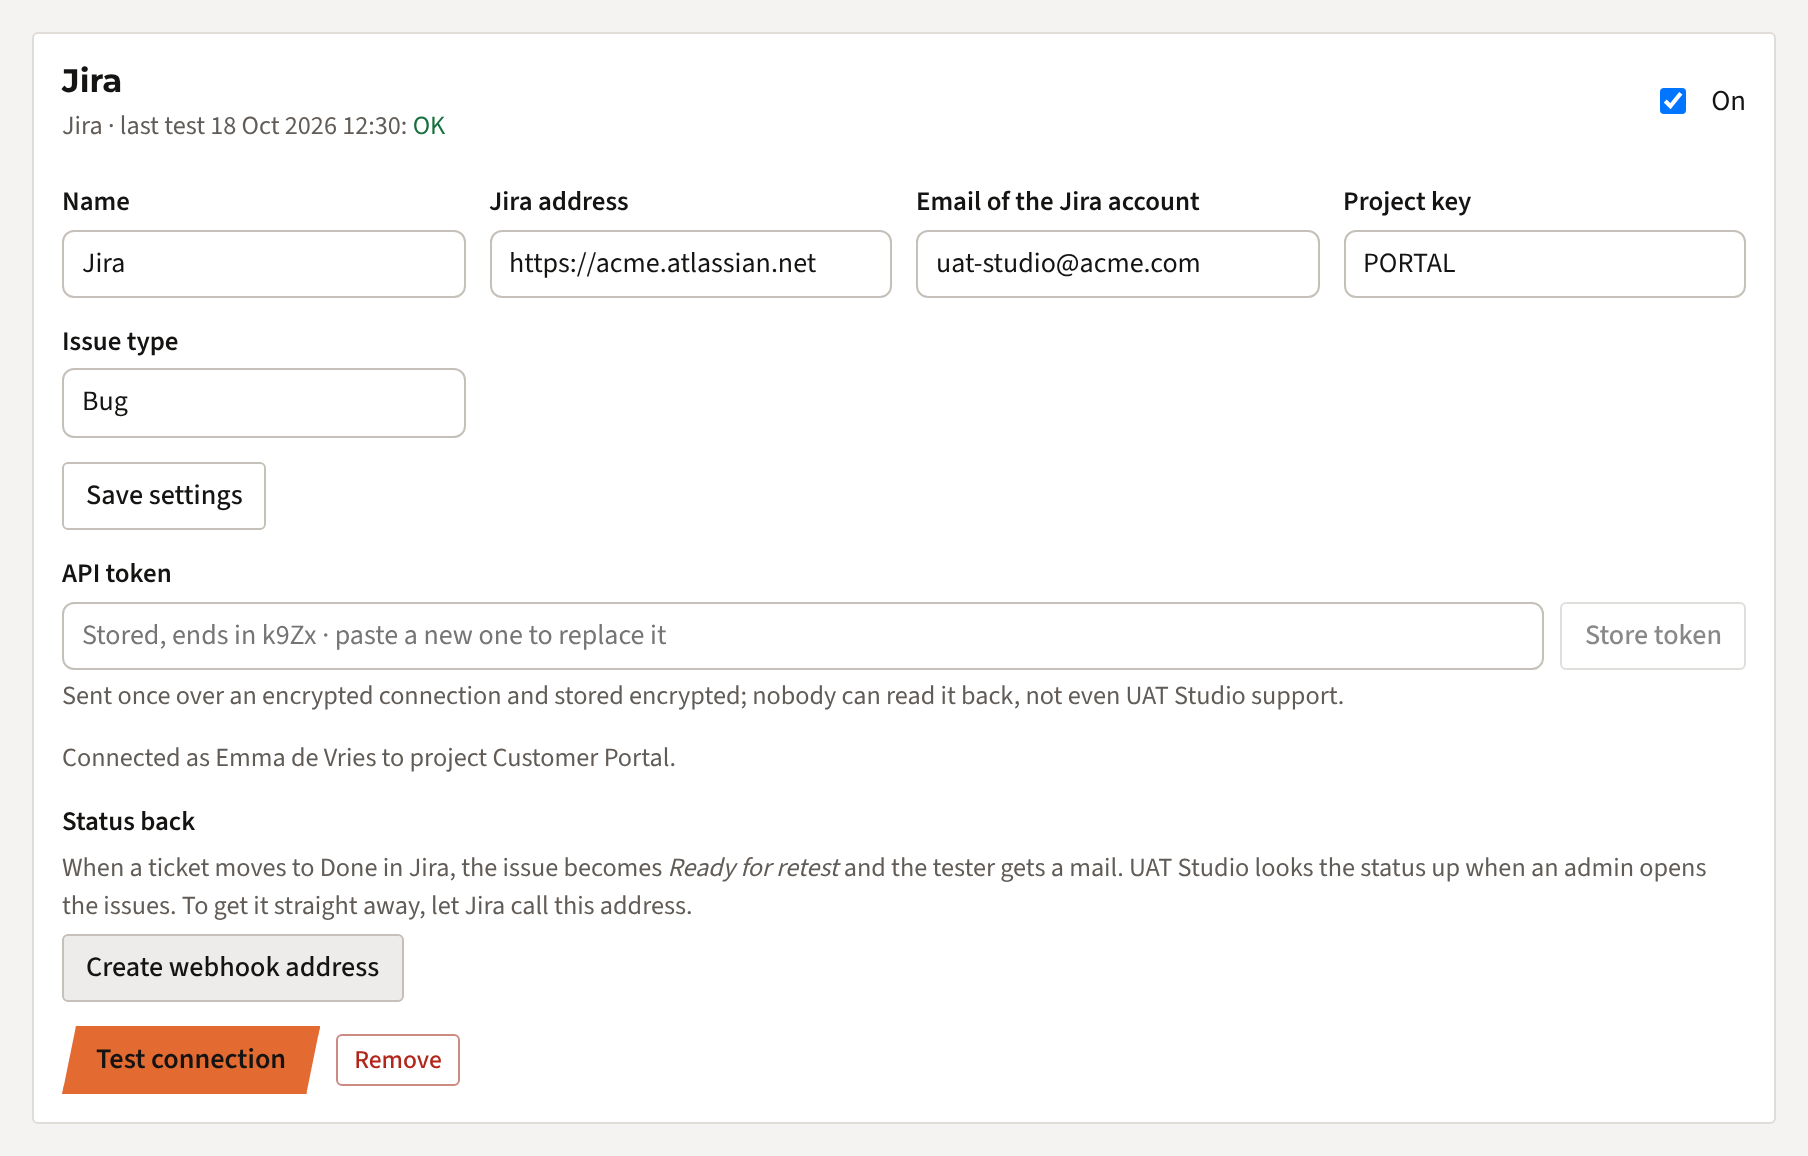
Paste the token from step 1 in the field API token and click Store token. The field then shows only the last 4 characters, so you can see which token is stored.

Test the connection
Click Test connection. UAT Studio signs in to Jira with your token and checks the project. When all is well you see Connected as <name> to project <project>, and OK next to the last test.
That's it. Every project in this workspace can now send issues to this Jira project.
Sending issues to Jira
One issue
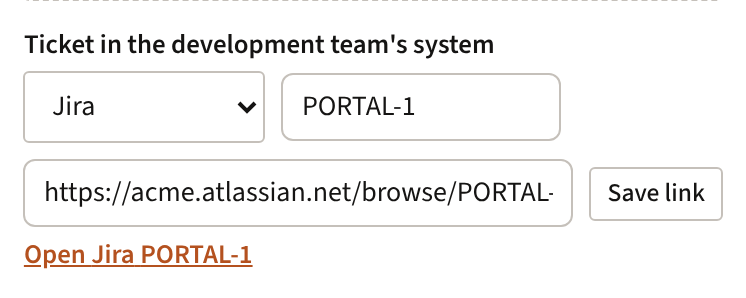
Open the issue. Under Ticket in the development team's system, click Send to Jira.
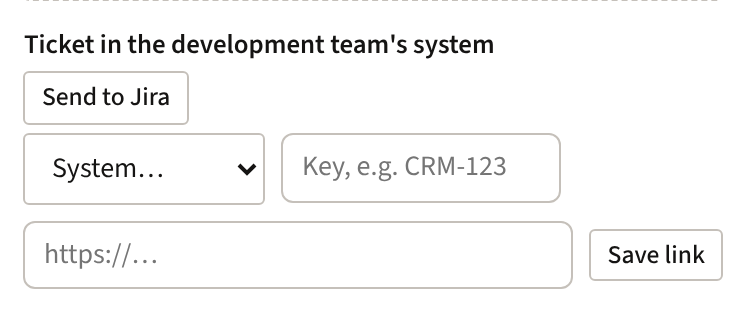
A few seconds later the ticket exists in Jira. The ticket number and a link appear on the issue, and the issue's history shows when it was sent and by whom. An issue that is already linked can't be sent twice by accident.
All issues after the triage call
In Issues › Triage, give each new issue a decision. When you're done, UAT Studio counts the issues to fix that have no ticket yet. Click Send 3 to Jira (or however many there are) to create all tickets at once.

What the Jira ticket contains
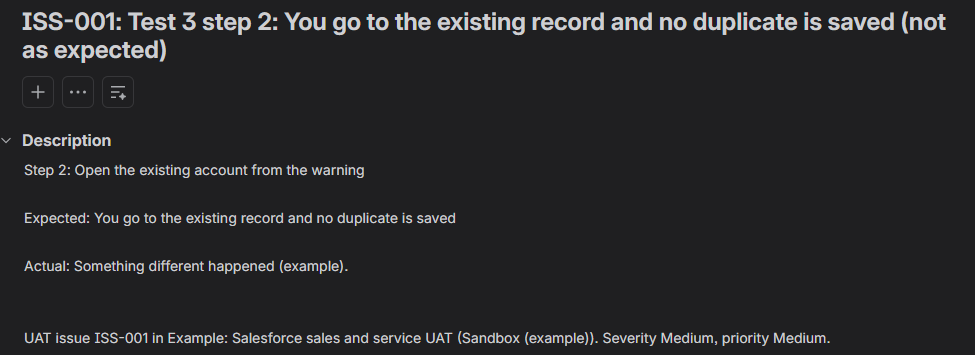
- Title: the issue number and title, such as ISS-012: Quote PDF shows the wrong VAT rate.
- Description: what the tester wrote, the test case with the step that failed and the expected result, the environment and who found it.
- Priority from the severity, and the labels
UATand the issue number, so you can filter on them. - A link back to the issue in UAT Studio, where the screenshots are.
Screenshots go along
The screenshots and files of the issue are attached to the Jira ticket: up to 10 files of at most 10 MB each. A file that doesn't fit stays in UAT Studio, and the issue's history says which one.
Merging duplicates
When you merge two issues in UAT Studio that both have a ticket, the duplicate ticket follows: it gets a comment, the link duplicates to the other ticket, and moves to Done. If your workflow doesn't allow that, UAT Studio tells you, and you close it in Jira yourself. When only the duplicate had a ticket, the issue that stays takes it over.
When the fix is done in Jira
When the developer moves the ticket to a status in the category Done, the issue in UAT Studio becomes Ready for retest and the tester gets a mail to retest. When the ticket moves to In Progress, the issue does too. The status in Jira is shown next to the ticket link.
A failed retest is never undone: when the tester reopens the issue while the ticket is still Done, UAT Studio leaves it open. A closed issue stays closed.
By itself, or straight away
Without doing anything, UAT Studio looks up the ticket status each time an admin opens the issues, and with the button Update ticket status.
Straight away: let Jira tell UAT Studio when a ticket moves. You need to be allowed to create an automation rule in the Jira project.
- In UAT Studio, under Connections, in the Jira connection, click Create webhook address and copy the address. It's shown only once.
- In Jira, open the project and go to Project settings › Automation › Create rule.
- Trigger: Work item transitioned (in older Jira: Issue transitioned). Leave From and To empty.
- Action: Send web request. Web request URL: the address you copied. Method POST. Web request body: Issue data (Jira format).
- Name the rule UAT Studio status and turn it on.
Who can do what
If something goes wrong
| You see | What to do |
|---|---|
| The token or email address is not accepted | The email address must be the one of the Atlassian account that created the token. Check for typos, or create a new token and store it again. |
| The project … was not found | Check the project key, and that the Jira account can see the project. |
| Sending fails on the issue type | The project has no type with that name. Look up the types in your Jira project and fill in the right one under Issue type. |
| It worked before, now it doesn't | The token has probably expired or was revoked. Create a new one and store it; the rest stays as it is. |
| The status doesn't come back | Open the issues as an admin, or click Update ticket status. With a webhook address: check that the automation rule is on and look at its audit log in Jira; under Connections you see when the last message arrived. |
| No Send to Jira button | Only admins see it, and only when the connection is On and has a stored token. |
| Connections are not part of your plan | Connections come with Team, Partner and Enterprise. Your admin can upgrade under Plan & billing. |
Still stuck? Mail [email protected] with the message you see. Never send us the token itself.
Using Azure DevOps? See Connect UAT Studio to Azure DevOps. All guides: UAT Studio help.
How we handle your token
- The token goes from your browser to our server once, over an encrypted connection.
- It is stored encrypted (AES-256). The key to decrypt it is kept separately from the database, so a copy of the database alone is useless.
- Nobody can read the token back: not in the app, not through support.
- UAT Studio uses the token only to test the connection, to create the tickets you send (with their files), to read the status of those tickets and to close a duplicate ticket after a merge. It doesn't read anything else in your Jira.
- Remove the connection or revoke the token in Atlassian, and access ends straight away.